
How to make a climbing wall at home?
Osm'ose"How to make a climbing wall at home?"
Here is a question that many ask themselves. You are a parent and you want to install a climbing wall to awaken your child? You are a climber and want to train to improve your performance?
But, is it possible? Do I need to hire a professional? What are the risks? We will try to answer all these questions in this article.
It is important to understand that your project will require more or less equipment depending on your budget, the space you have and of course your desires. Also, it is always preferable to work with recognized professionals in order to secure your climbing space. We will come back to this later, but in the meantime we will give you the keys to build a climbing wall at home and simply.
1. Choosing the right wall
2. Provide enough space
3. Provide the necessary materials for the installation of your load-bearing wall
4. Attach the structure to the bearing wall
5. Attach the rafters to the panels
6. Attach your panels to your structure
7.Secure
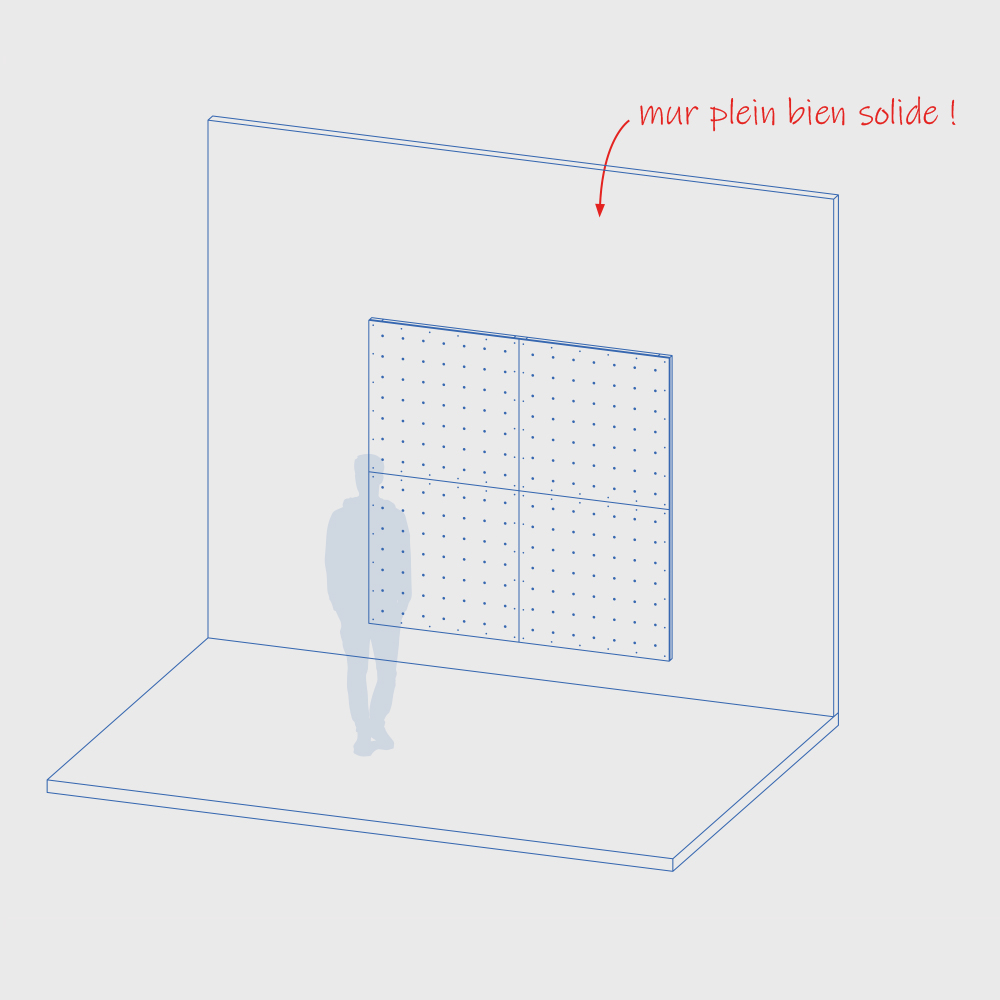
1. Choose the right wall
Before starting this ambitious project, it will be necessary to verify that all the ingredients are present to carry it out safely. To do this, it is imperative to choose a solid wall!
We advise you to choose a solid concrete wall to avoid any risk. We strongly advise you not to fix your climbing wall on any other support (hollow brick, plasterboard, etc...)
Structures that welcome the public are subject to specific safety standards. Unfortunately, the distribution of these standards is totally forbidden and people who wish to obtain them must obtain them via AFNOR. If your ambitious project exceeds your DIY skills, it is preferable to call in a trustworthy professional.
If on the other hand you feel like a qualified carpenter, you might want to build a sloping roof... (in this case it's this way)
2. Provide enough space
Osm'oseOnce again, providing enough space is a must if you want maximum safety!
The use of a landing mat is recommended to limit the risk of injury during a fall, discover our tips for choosing your mattresses.
Did you know that 35% of injuries occur during a fall?
3. Plan the material needed to install your wall
After finding THE right wall in your home, it's time to look at the materials you need to build your pan 😊.
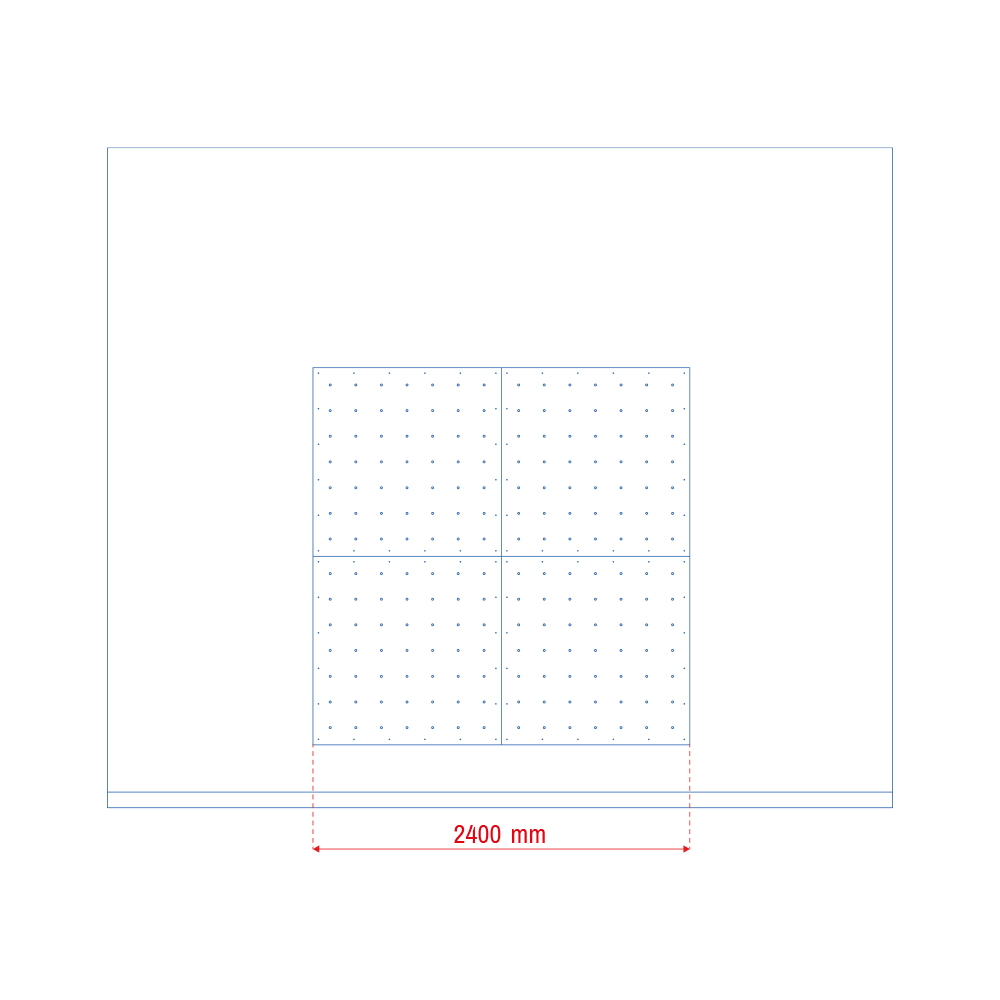
We will explain how to make a wall of 2.40x2.40m, ideal for a child's bedroom or a living room with an atypical and contemporary style worthy of the greatest architect's houses
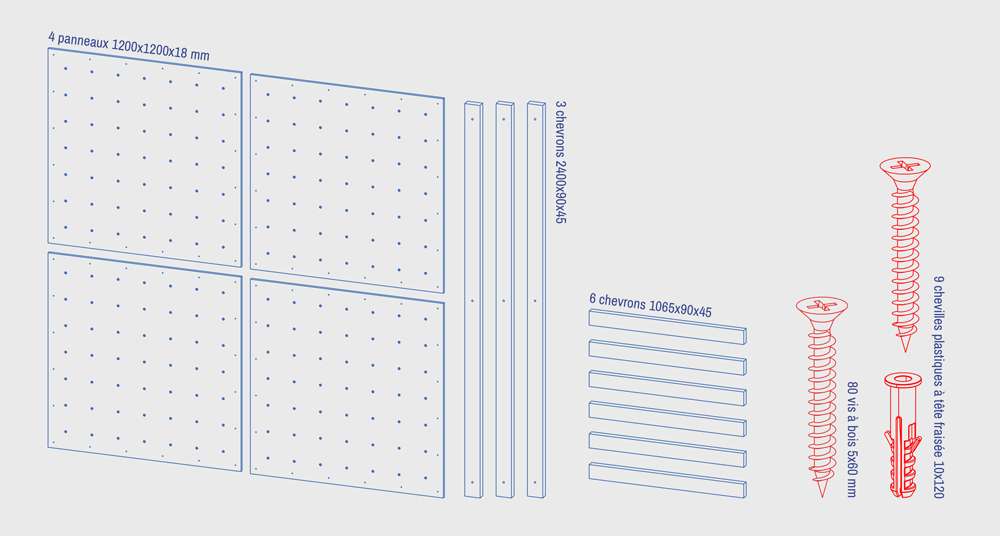
Here is the list of materials for the installation of the wall:
- x3 rafters 2400 x 90 x 45mm
- x6 rafters 1065 x 90 x 45mm
- x80 Wood screws 5x60
- x9 HRD dowels 10x120
- x4 Plywood panels 18mm thick in 1200 x 1200mm
We recommend the use of our climbing panels because they meet the NF EN 12 572-2 standard.
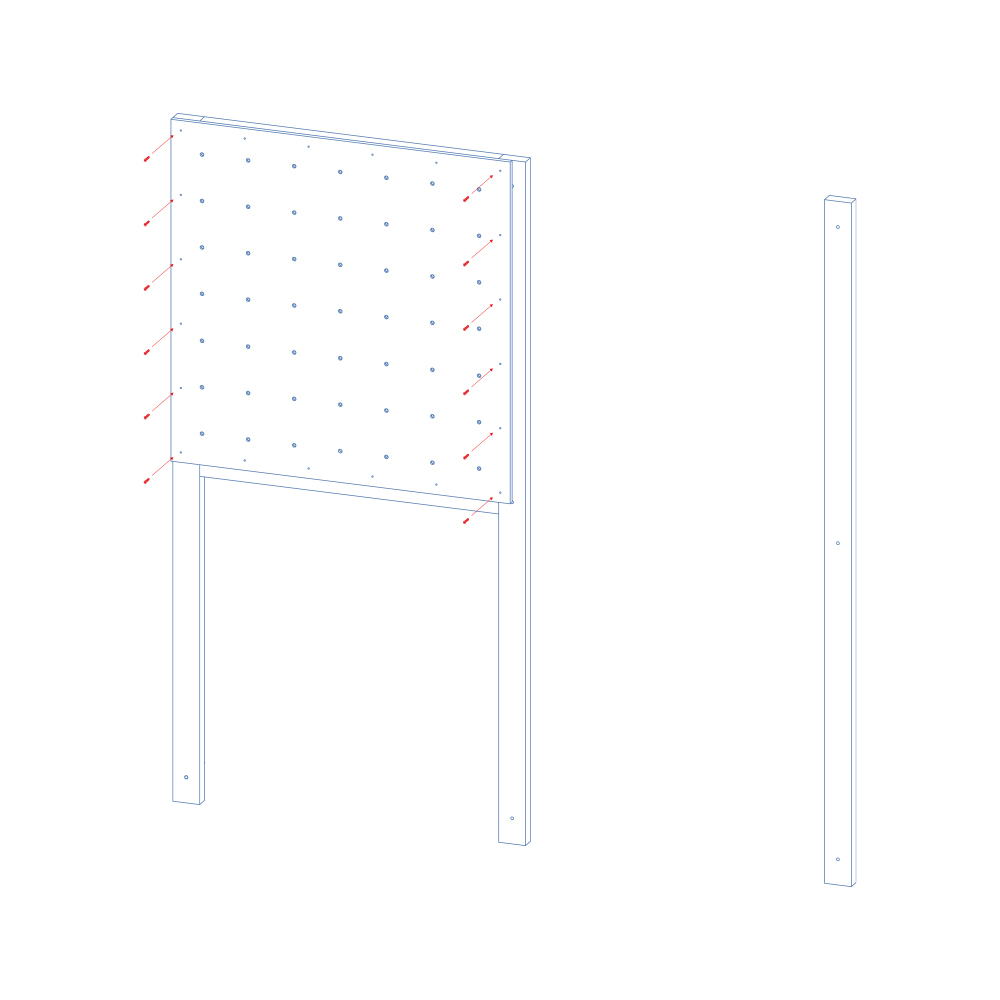
4. Fix the structure to the supporting wall
Osm'oseLet's go ! Now we put on our best apron and get to work (well almost 😊)
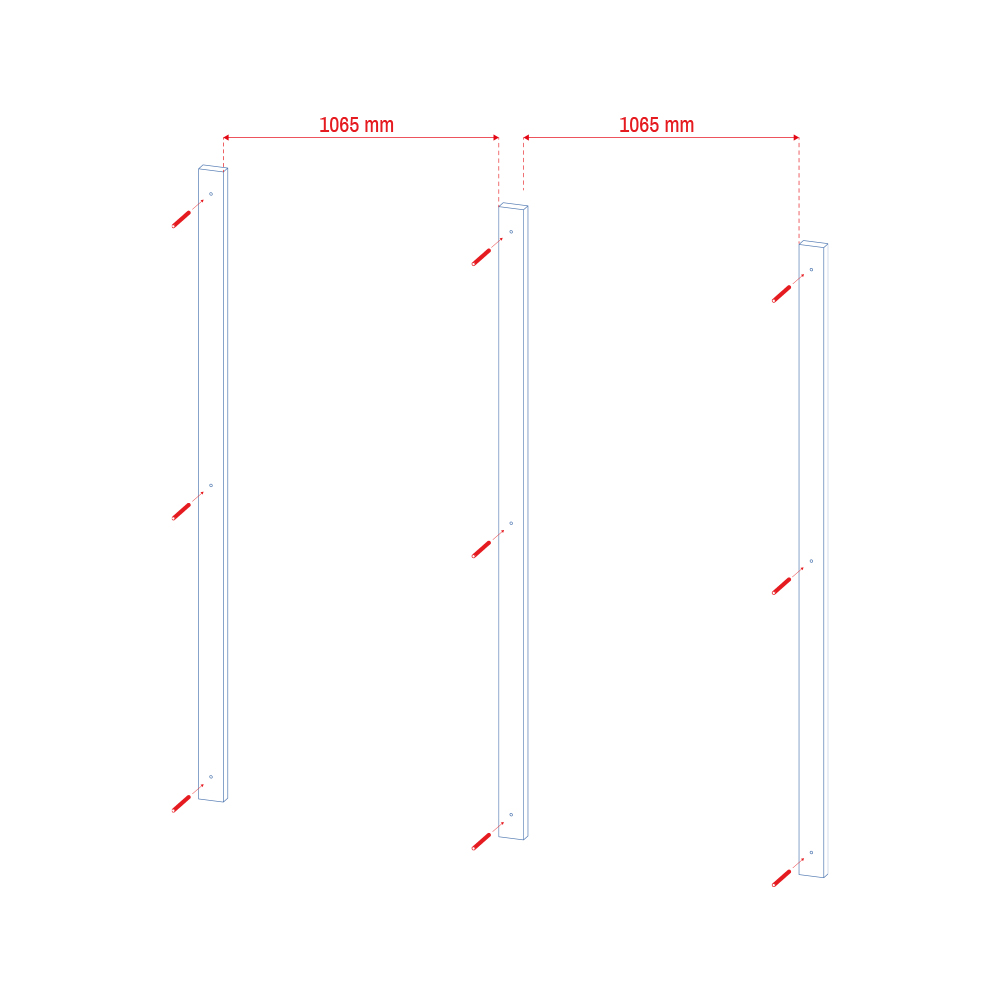
We'll start by attaching the 2400x90x45 rafters as shown on the diagram to the right using HRD 10x120 plastic dowels.
Your main support structure is now ready. You can of course choose to position your rafters flush with the ground.
However, we recommend that you do not position your rafters as low as possible but leave a space of 10 to 40cm on the ground in order to leave room for a receiving mat. This will of course depend on the space you have available.
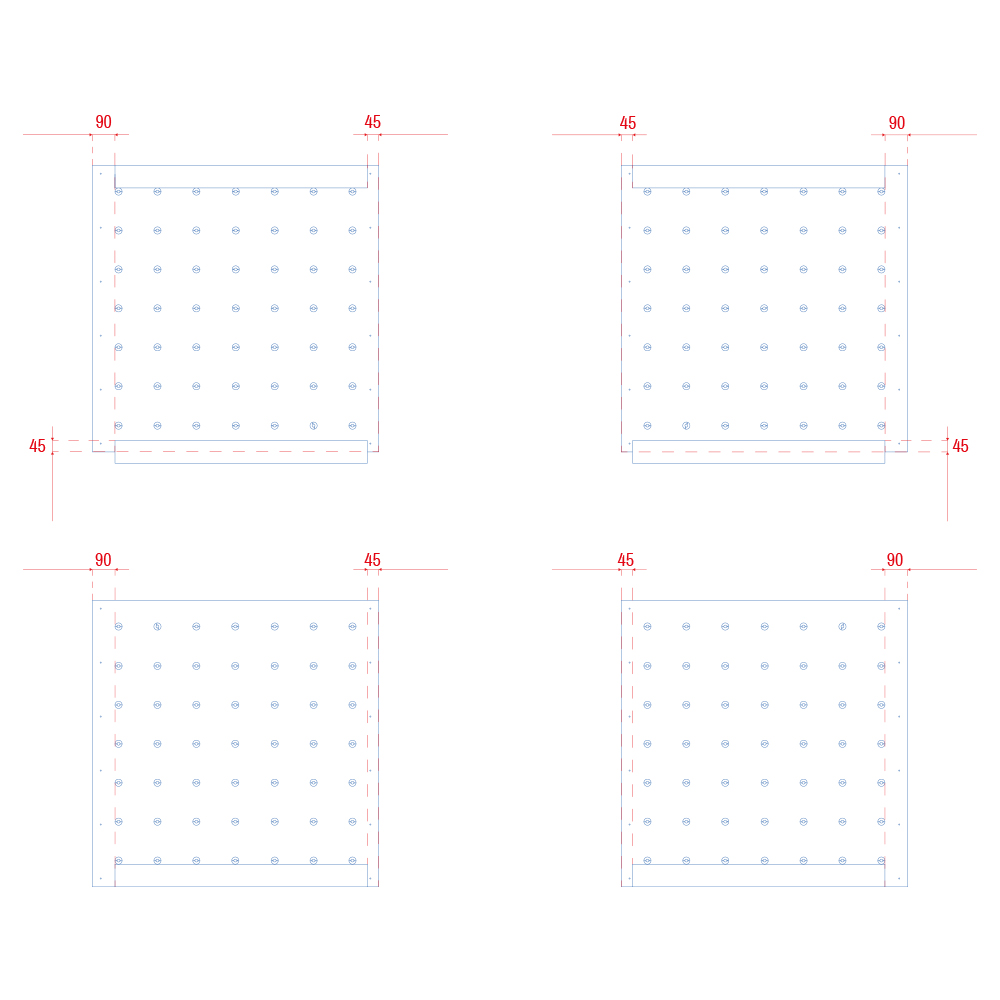
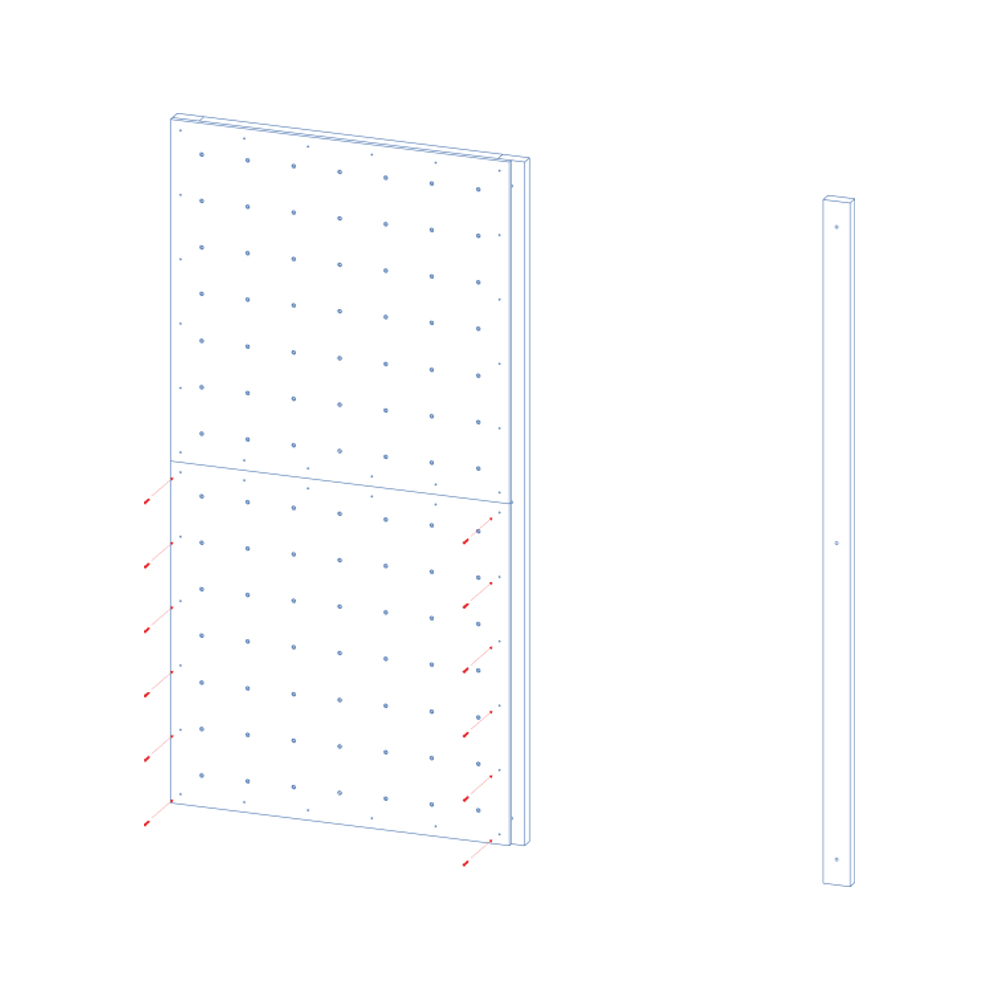
5. Attach the rafters to the panels
Next, attach the small rafters directly to your 1200x1200 panels as shown on the plan opposite. We recommend using certified panels that comply with the standard to ensure maximum safety.
NB : If you choose to fix your wall outside your house we recommend to use panels designed for this use like our exterior panels, which will have to be protected from direct weather (rain, snow, sun hail are real aggression for the panels).
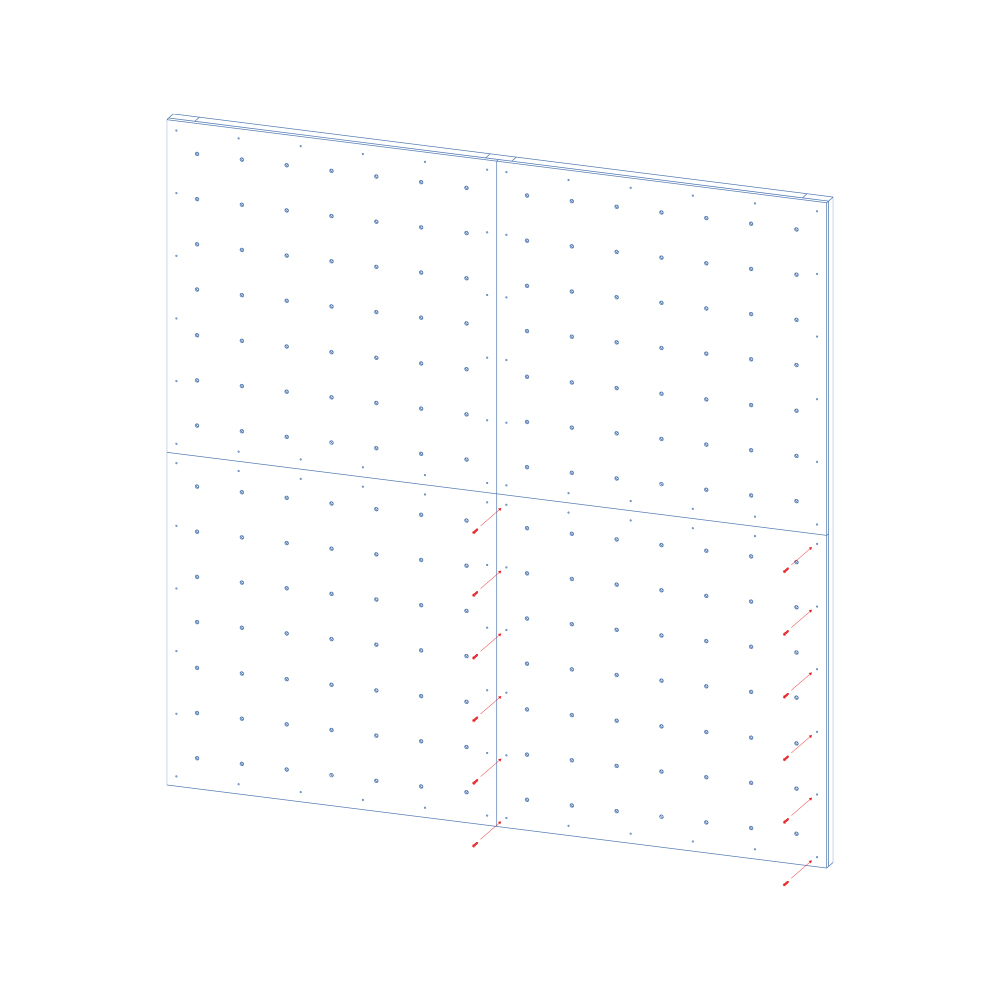
6. Fix your panels to your structure
Osm'oseWe will start by fixing the 2400x90x45 rafters as shown on the diagram opposite using HRD 10x120 plastic pegs.
Your main support structure is now ready. You can of course choose to position your rafters flush with the ground.
However, we recommend that you do not position your rafters as low as possible but leave a space of 10 to 40cm on the ground in order to leave room for a receiving mat. This will of course depend on the space you have available.

7. Secure
Osm'oseThink of equipping yourself with a landing mat to protect yourself against falls!